
Visual Schedules for Autism: A Special Education Teacher's Guide
By Natalie · Special Education Teacher · July 19, 2026
A visual schedule is a sequence of pictures, icons, objects, or words that shows a student what is happening now and what happens next, in the order it will happen. For learners with autism, who often find spoken directions and sudden change hard to process, a visual schedule turns an abstract routine into something concrete they can see, touch, and follow on their own.
Why visual schedules matter for autism
Many students with autism process visual information more easily than spoken language, and they do their best work when the day feels predictable. A visual schedule answers two questions before a student even has to ask: what am I doing now, and what comes after that. Once a student trusts the schedule, transitions get calmer, anxiety around the unknown drops, and independence goes up, because the student is reading the schedule instead of waiting on an adult to tell them what's next.
Types of visual schedules
Not every student needs the same kind of schedule. Match the format to the student's current understanding, and grow it over time.
- Object schedules. A physical object represents each activity (a spoon for snack, a swimsuit for pool day). This is the most concrete starting point for students who aren't yet reading pictures or words.
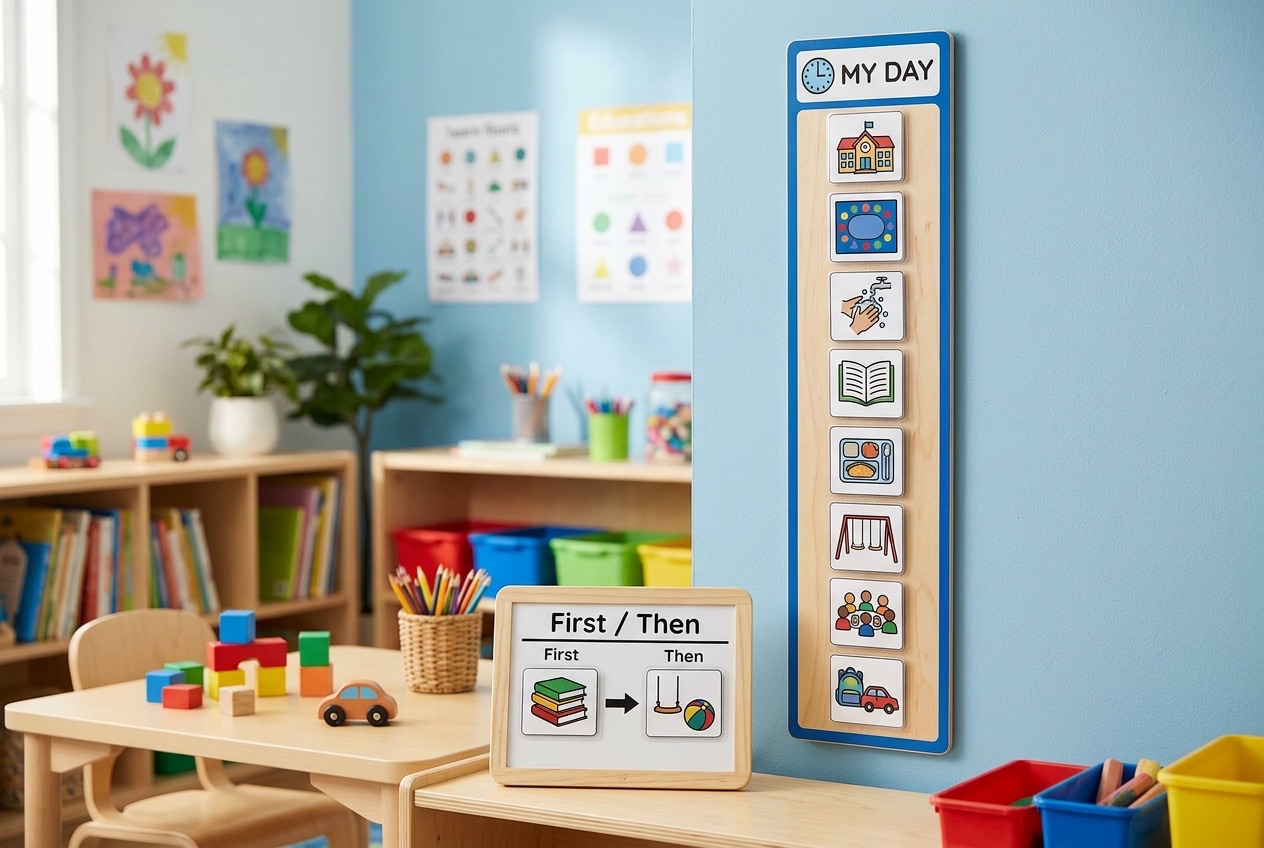
- First, Then boards. A simple two-step board that pairs a less-preferred task with a preferred one ("first work, then iPad"). This is often the very first visual schedule a student learns to use.
- Mini schedules. A short strip of two to four pictures showing the steps within one activity or transition, useful for breaking a single routine, like arrival or hand washing, into a sequence.
- Full-day schedules. A longer, vertical strip of picture or word cards showing every activity in order for a whole session or day, usually with a "finished" pocket where completed cards go.
- Checklist schedules. For students who read, a written list of tasks they check off as they go, which builds toward the kind of planner or agenda they'll use in general education settings.
How to build a visual schedule, step by step
- Pick a format. Start with the most concrete option the student can understand: object, then picture, then word, moving up only once the current level is solid.
- Choose the activities. Include everything the schedule needs to cover for that block of time, in the actual order it happens.
- Make it physical. Velcro-mount picture cards on a vertical strip or board so the student can remove each card as it's completed, and add a "finished" pocket or envelope for a clear sense of completion.
- Teach the routine explicitly. Walk the student through checking the schedule, doing the activity, removing the card, and checking again, using hand-over-hand or a visual prompt as needed and fading your help over time.
- Keep it in a consistent spot. The schedule should live in the same location every day so checking it becomes automatic, not something that requires a reminder.
- Review and adjust. If a student stops engaging with the schedule, the format is usually too advanced, or too babyish, for where they are, so step the visual support up or down rather than dropping it.
Building visual supports into an independent work system
Visual schedules work best when they're part of a bigger structure, not a standalone poster. In a TEACCH-style independent work system, the schedule is what tells the student where to go next, and task boxes are what wait for them when they get there. Used together, the schedule answers "where do I go" and the task box answers "what do I do," which is exactly the kind of two-part clarity that lets a student move through a work block with no adult narration at all.
Printable visual supports to start with
You don't have to build every visual support from scratch. A set of printable social stories pairs well with a visual schedule for teaching new routines and transitions, since the story explains the "why" behind a step the schedule only shows in pictures. For the work itself, printable autism tasks give students something concrete to do once the schedule sends them to a work station, so the visual support carries all the way through the task, not just the transition to it.
Common mistakes that stall progress
A few habits quietly undermine an otherwise good visual schedule:
- Skipping the "finished" step. If completed cards just pile up with nowhere to go, the student never gets a clear sense of closure, which is often the part that makes a schedule calming in the first place.
- Changing the format too often. Switching between object, picture, and word versions before a student has mastered the current one usually resets progress instead of speeding it up.
- Only using it for work time. A schedule that only appears during instruction misses most of its value. The same visual structure helps just as much at arrival, during transitions, and across the whole day.
- Talking over the schedule. If you narrate every step verbally while the student checks their schedule, they learn to wait for your voice instead of reading the picture. Point, don't narrate, and let the visual do the work.
Visual supports beyond the schedule itself
A visual schedule usually works alongside a few other supports, not alone. A choice board lets a student pick between two or three preferred activities using the same picture-based format, which keeps the "read, then act" skill consistent across different parts of the day. A visual timer paired with the schedule helps a student understand not just what's next, but roughly how long the current activity will last, which reduces the number of times they check in with an adult. None of these need to be complicated: a laminated card, a strip of Velcro, and a consistent routine go a long way.
Where to start
If your students are brand new to visual schedules, start with a First, Then board before anything longer. It's the fastest way to teach the "check it, do it, remove it" routine, and once that clicks, expanding to a full-day schedule is mostly a matter of adding more cards, not teaching a new skill.
Looking for more? Browse all Guides & Resources, or contact us with questions.